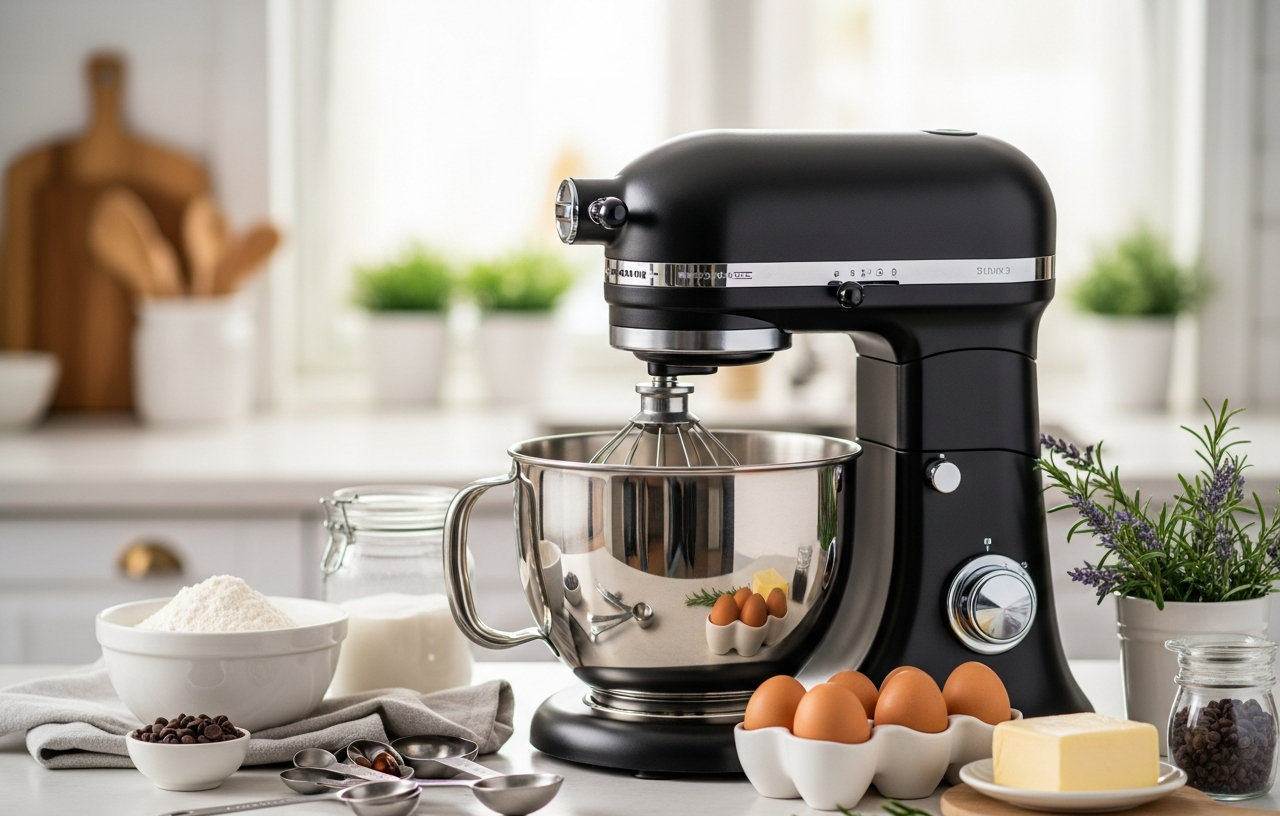
A stand mixer greatly reduces the effort required for baking and cooking tasks, from kneading dough to whipping cream. Understanding how to use a stand mixer effectively involves knowing its components, attachments, and speed settings.
Understanding Your Stand Mixer
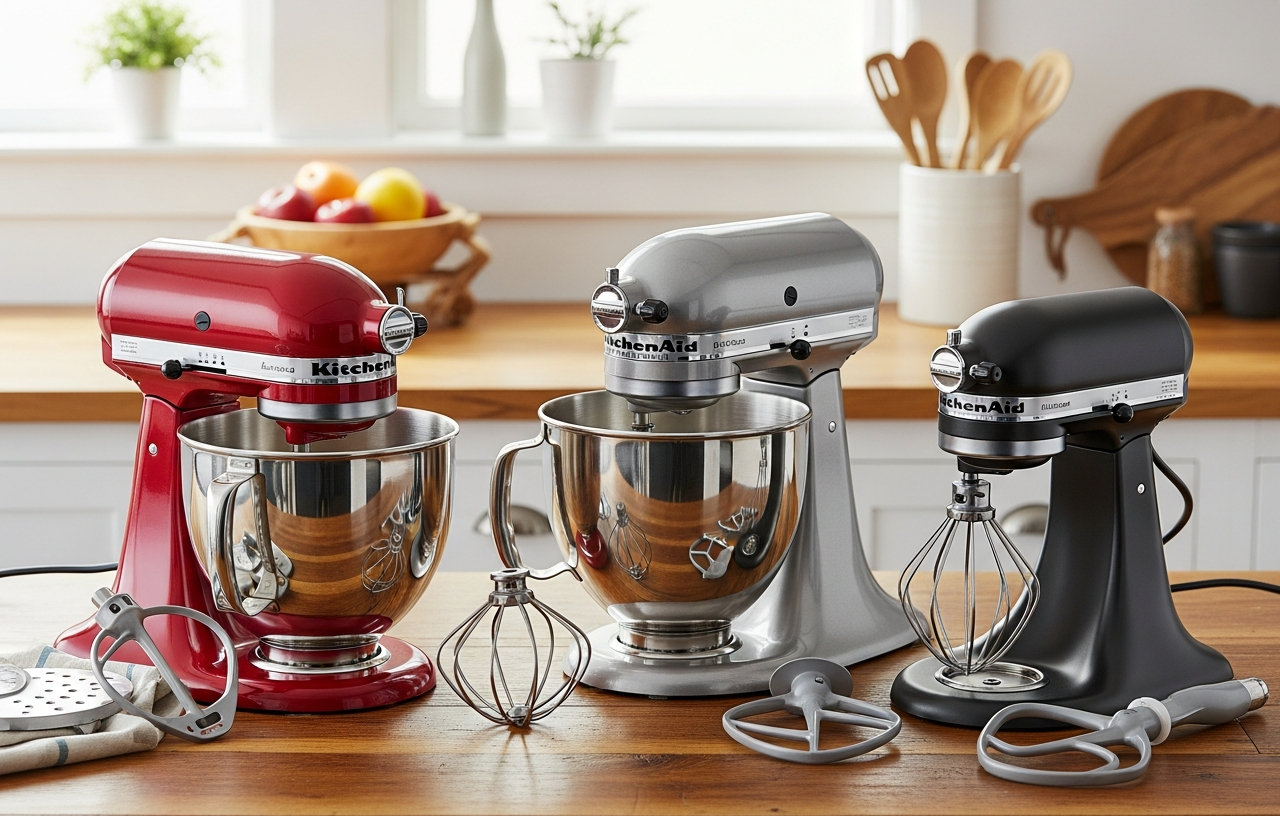
Before you even plug it in, familiarize yourself with your stand mixer's basic structure. Most stand mixers, including popular KitchenAid models, feature a heavy base housing the motor, a head that holds the attachment, and a mixing bowl. The two primary designs are tilt-head and bowl-lift.
Tilt-Head vs. Bowl-Lift Designs
Tilt-head mixers feature a head that tilts back, allowing easy access to the bowl and attachments. This design is generally more compact and is often preferred for home use where counter space might be limited. They typically come with a mechanism to lock the head in place during operation for stability.
For example, the KitchenAid Artisan Series 5 Quart Tilt Head Stand Mixer with Pouring Shield KSM150PS is a robust tilt-head model. Its durable metal construction and 59 touchpoints ensure thorough ingredient incorporation, even for large batches, such as up to 9 dozen cookies.
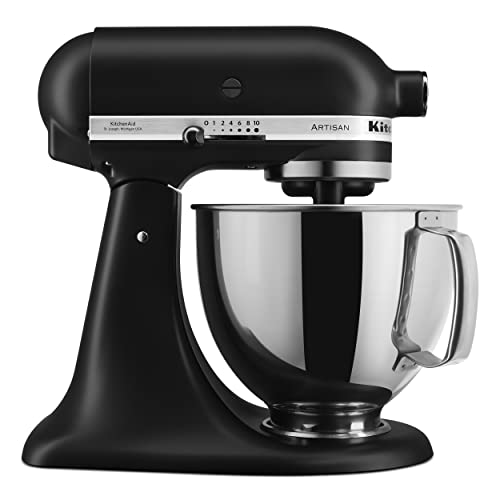
- Built to take it all on with the durable and built-to-last metal construction, and 59 touchpoints around the mixer bowl for great mixing results.. 5 Quart Stainless Steel Bowl with comfortable handle for small or large batches, to mix up 9 dozen cookies* in a single batch. Dishwasher safe. *Using the flat beater; 28g dough each.. Easily add ingredients with the tilt-head design, because you'll have better access to the bowl - lock the head in place while mixing.. 10 speeds for nearly any task or recipe, from mixing ingredients together on the stir speed, to whipping cream at speed 8, you'll get thorough ingredient incorporation every time.
Another excellent tilt-head option is the KitchenAid Classic Series 4.5 Quart Tilt-Head Stand Mixer K45SS. This model offers the same convenient tilt-head access and 59 touchpoints for efficient mixing, making it suitable for mixing up to 8 dozen cookies in a single batch.

- Built to take it all on with the durable and built-to-last metal construction, and 59 touchpoints around the mixer bowl for great mixing results.. 4.5 Quart Stainless Steel Bowl to mix up to 8 dozen cookies in a single batch. Dishwasher safe. Using the flat beater; 28g dough each. Easily add ingredients with the tilt-head design, because you'll have better access to the bowl - lock the head in place while mixing. 10 speeds for nearly any task or recipe, from mixing ingredients together on the stir speed, to whipping cream at speed 8, you'll get thorough ingredient incorporation every time
Bowl-lift mixers have a stationary head. The mixing bowl attaches to arms that lift it into position, securing it closer to the attachment. This design usually accommodates larger bowls and more powerful motors, making them ideal for very heavy doughs or larger batches. They are often found in professional settings or for serious home bakers who frequently prepare large quantities.
Key Components
- Motor Head: Contains the motor and gears that power the attachments.
- Attachment Hub: Located at the front of the motor head, this port allows you to connect various specialized attachments (more on these later).
- Speed Control: A lever or dial to adjust the mixing speed, typically offering 6 to 12 settings.
- Bowl: Usually stainless steel, ranging from 3.5 to 7 quarts in capacity.
- Power Cord: Connects the mixer to an electrical outlet.
Essential Attachments and Their Uses
Your stand mixer comes with several standard attachments, each designed for specific tasks. Knowing which one to use is fundamental to how you work a KitchenAid mixer or any other brand.
The Flat Beater (Paddle Attachment)
This is your go to attachment for most standard mixing tasks. It's shaped like a flat paddle and is ideal for ingredients that need to be creamed, mixed, or beaten without adding too much air. Use it for:
- Cookie dough
- Cake batter
- Brownie batter
- Frostings and icings
- Mashed potatoes
- Quick breads
The Martha Stewart 5.3Qt Stand Mixer includes a flat beater with a silicone edge, which helps scrape the sides of the bowl as it mixes, reducing the need to stop and manually scrape.

- 5.3QT STAINLESS STEEL BOWL: The polished 5.3-quart capacity easily handles large batches: mix dough, cake batter, and up to 9 dozen cookies with ease. 3 VERSATILE ATTACHMENTS: Includes a stainless steel whisk, dough hook, and flat beater with silicone edge for efficient, thorough mixing. 12 OPTIMIZED SPEED SETTINGS: Precision control lets you gently fold, thoroughly mix, or power through thick doughs for flawless results. TILT-HEAD DESIGN: Quickly access the bowl for adding ingredients, scraping sides, changing attachments, or checking progress
The Wire Whip (Balloon Whisk)
The wire whip, resembling a balloon whisk, is designed to incorporate air into mixtures. It excels at creating light and fluffy textures.
- Whipping egg whites (for meringues, soufflés)
- Whipped cream
- Light batters (like for angel food cake)
- Mayonnaise
The Dough Hook
Shaped like a 'C' or a spiral, the dough hook is specifically made for kneading yeast doughs. It mimics the action of hand-kneading, developing gluten for elastic, airy bread.
- Bread dough (sourdough, whole wheat, brioche)
- Pizza dough
- Pasta dough
- Bagel dough
Getting Started: Your First Mix
Required Tools & Materials
- Your stand mixer
- Mixing bowl
- Desired attachment (flat beater, wire whip, or dough hook)
- Ingredients for your recipe
- Rubber spatula (for scraping)
Safety Warnings
- Always make sure the mixer is unplugged before attaching or detaching components.
- Keep hands, hair, and clothing away from moving parts during operation.
- Never operate the mixer with the attachment hub cover removed if not using an attachment.
- Make sure the mixer head is locked (for tilt-head models) or the bowl is securely seated (for bowl-lift models) before starting.
How to Use a Stand Mixer: step by step Guide
Here is a detailed approach on how to use a KitchenAid stand mixer or any similar model for your baking projects. (Estimated time: 5-15 minutes per mixing task, plus prep and cleanup.)
-
Step 1: Position and Secure the Bowl (20 seconds)
Place your stand mixer on a clean, stable, and flat surface. For most models, the mixing bowl twists and locks into the base. Make sure it is securely seated to prevent it from rattling or detaching during operation.
-
Step 2: Attach the Correct Accessory (30 seconds)
Refer to your recipe to determine which attachment is needed. For tilt-head mixers, tilt the head back, then slide the attachment onto the attachment shaft and twist to secure it. For bowl-lift mixers, the bowl should be lowered, then the attachment slides onto the shaft and twists. Always make sure the attachment clicks into place. This is a critical step for how to work a KitchenAid mixer properly.
-
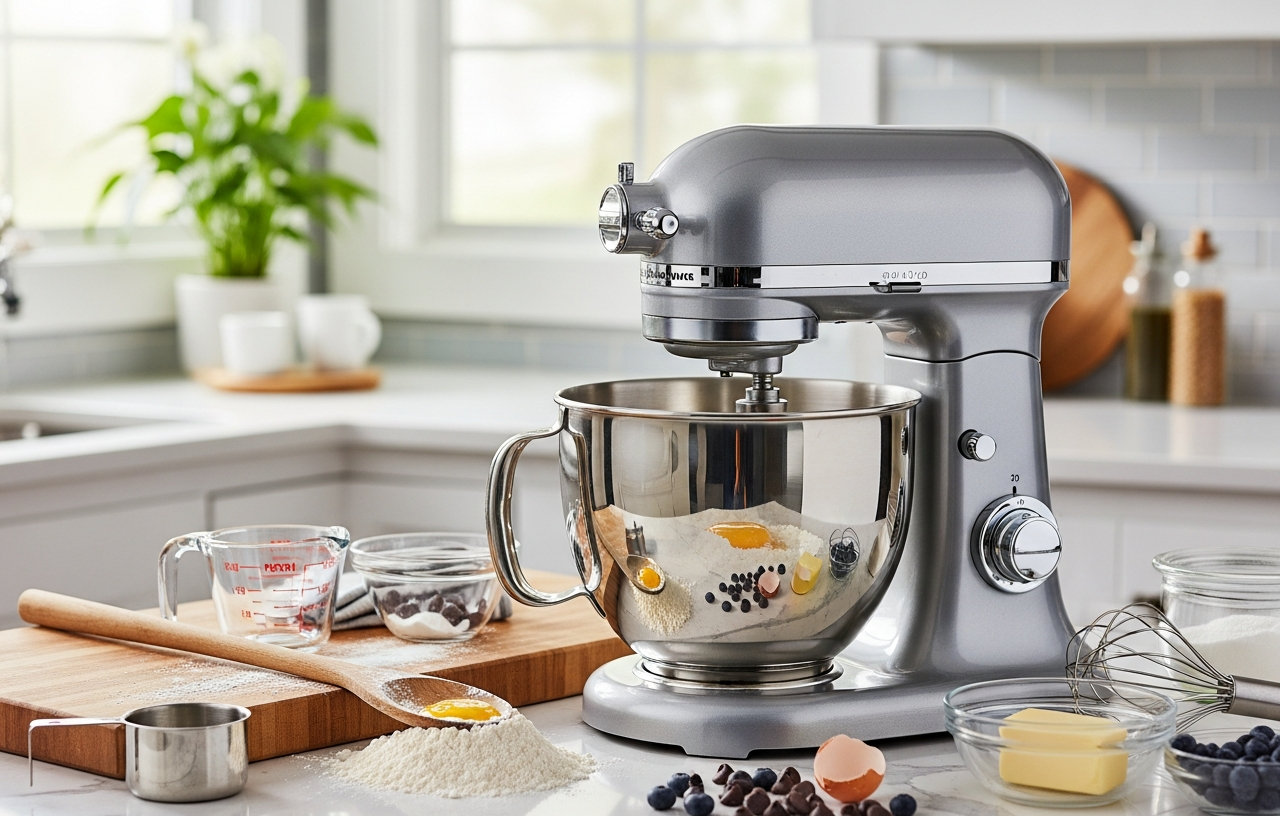
Step 3: Add Your Ingredients (1-3 minutes)
Carefully add your recipe's ingredients to the mixing bowl. For liquids, add them first, followed by dry ingredients. This helps prevent dry ingredients from puffing up when the mixer starts. If using a pouring shield (often included with models like the KitchenAid Artisan Series), attach it now over the bowl. This accessory helps prevent splashes and allows you to add ingredients while the mixer is running.
-
Step 4: Lower the Head or Raise the Bowl (10 seconds)
If you have a tilt-head mixer, gently lower the head until it locks into place. For bowl-lift models, use the lever to raise the bowl until it is secured and the attachment is properly positioned within the bowl.
-
Step 5: Select the Correct Speed (Varies per recipe)
Plug in your mixer. Always start at the lowest speed setting (often labeled 'Stir' or '1') to gently combine ingredients and prevent dry ingredients from flying out of the bowl. Gradually increase the speed as directed by your recipe. Higher speeds are used for whipping and aerating, while lower speeds are for mixing and kneading. The Martha Stewart 5.3Qt Stand Mixer offers 12 optimized speed settings, providing precision control for various tasks.
-
Step 6: Monitor and Scrape the Bowl (Throughout mixing)
Periodically stop the mixer (or use the pouring shield opening) and use a rubber spatula to scrape down the sides and bottom of the bowl. This makes sure all ingredients are fully incorporated and prevents unmixed pockets. Do this especially when creaming butter and sugar or mixing thick batters.
-
Step 7: Turn Off and Detach (30 seconds)
Once your ingredients are properly mixed, turn the speed control to 'Off' and unplug the mixer. If it's a tilt-head model, tilt the head back. For bowl-lift models, lower the bowl. Carefully remove the attachment and then the mixing bowl.
-
Step 8: Clean Your Mixer (5-10 minutes)
Immediately clean the bowl and attachment. Most stainless steel bowls and standard attachments (flat beater, dough hook, wire whip) are dishwasher safe, but always check your manufacturer's instructions. Wipe down the motor head and base with a damp cloth; never submerge the motor head in water. Proper cleaning extends the life of your appliance.
Advanced Stand Mixer Techniques
Beyond basic mixing, your stand mixer can handle more specific tasks.
Using the Pouring Shield
Many mixers, like the KitchenAid Artisan Series, come with a pouring shield. This plastic shield fits around the top of the bowl, offering two main benefits: it contains splatters, especially when mixing at higher speeds, and it provides a chute to add ingredients gradually without stopping the mixer. This is particularly helpful for delicate items like flour or chocolate chips.
Handling Different Doughs
For dense bread doughs, always use the dough hook on a low speed (typically speed 2). Mixing too fast can overheat the motor or cause the mixer to 'walk' across your counter. For lighter doughs, like brioche, you might use a slightly higher speed after the initial ingredients are combined, but still keep it moderate. Monitor the dough for consistency, as over-kneading can result in tough bread.
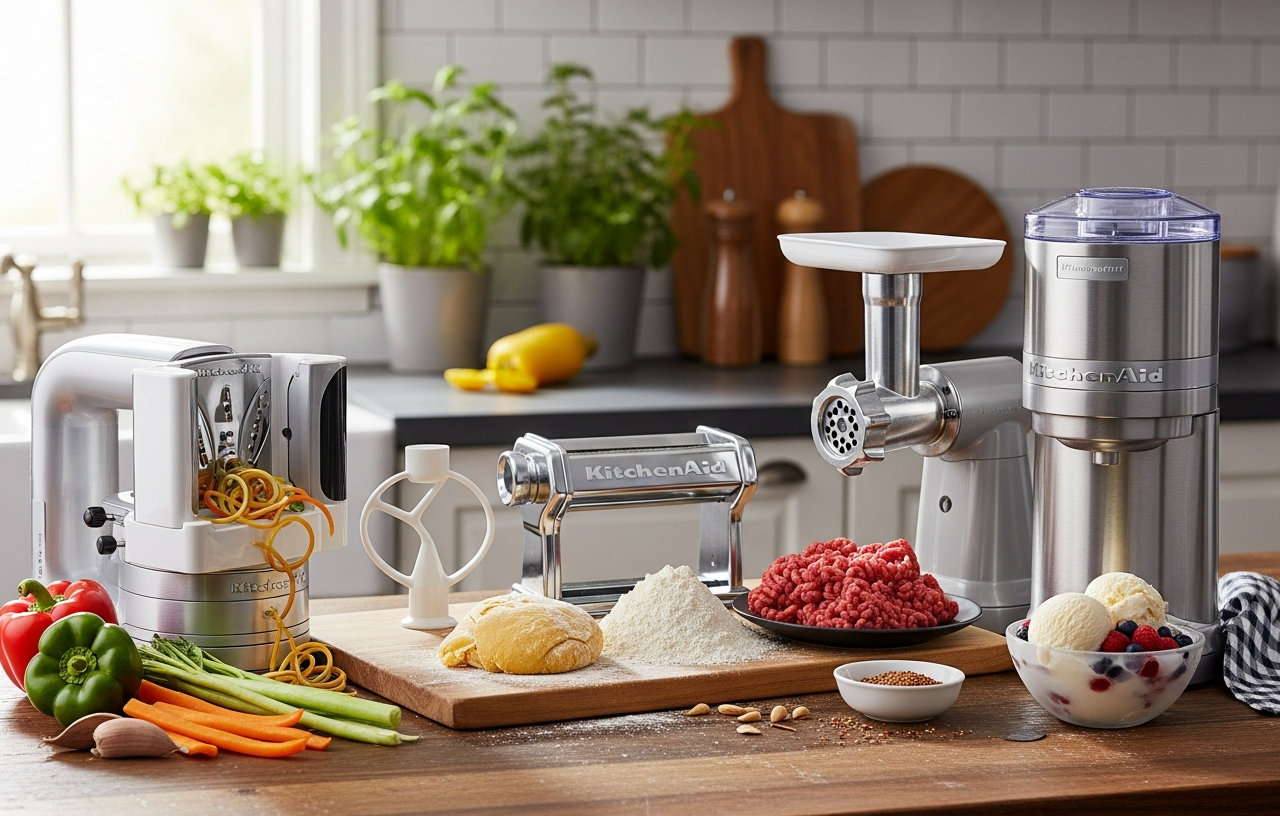
Exploring Specialized Attachments
The attachment hub on your stand mixer is a versatile portal for expanding its capabilities far beyond baking. Learning how to use KitchenAid pasta attachments, for instance, opens up a world of homemade Italian cuisine.
Pasta Attachments
To use KitchenAid pasta attachments, first secure the pasta roller or cutter to the front hub. Prepare your pasta dough according to a recipe, usually using the dough hook on your mixer. Once rested, flatten a small portion of dough and feed it through the roller on the lowest thickness setting. Gradually increase the thickness setting, passing the dough through each setting multiple times until it reaches your desired thinness. Then, swap to a cutter attachment (fettuccine or spaghetti) and feed the rolled sheets through to create fresh pasta. This process transforms your stand mixer into a powerful pasta-making machine.
Other Popular Attachments
- Meat Grinder: For making your own ground meat, sausages, or even grinding vegetables.
- Ice Cream Maker: A bowl attachment that freezes and churns ice cream, sorbet, or gelato.
- Spiralizer: Turns fruits and vegetables into spirals, ribbons, or sheets for healthier meals.
- Food Grinder/Shredder: Quickly grates cheese, shreds vegetables, or grinds nuts.
Understanding the range of available accessories can help you decide which stand mixer is best for your needs. Explore the best KitchenAid attachments to maximize your mixer's potential.
Maintenance and Care
Proper maintenance ensures your stand mixer remains a reliable kitchen companion for years.
Regular Cleaning
As mentioned in the steps, always clean the bowl and attachments immediately after use. For the main unit, a simple wipe-down with a damp cloth is sufficient. Avoid harsh abrasive cleaners that could damage the finish.
Motor Care
Avoid overloading your mixer with excessively stiff doughs or large quantities beyond its capacity. This can strain the motor. If your mixer feels hot to the touch or starts to make unusual noises, turn it off and let it cool down before resuming. For insights into different models, a KitchenAid stand mixer comparison can help you understand motor capabilities.
Storage
Store your stand mixer in a cool, dry place. If possible, keep it on the counter for easy access, but use a dust cover if it's not used frequently. Store attachments in a drawer or a designated container to prevent damage or loss.
Troubleshooting Common Issues
Even with proper use, you might encounter minor issues.
- Mixer 'Walking': If the mixer moves across the counter, it's likely overloaded or mixing a very stiff dough at too high a speed. Reduce the quantity or speed.
- Attachment Not Reaching Bottom: For tilt-head mixers, you might need to adjust the beater-to-bowl clearance. Consult your user manual for specific instructions on how to do this with a screw adjustment.
- Unusual Noises: A slight whirring is normal, but grinding or clunking sounds indicate a potential issue. Stop the mixer immediately and consult the manual or customer support.
- Ingredients Not Incorporating: This usually means you are not scraping the bowl enough. Stop and scrape thoroughly, especially with thick batters.
Mastering how to use a stand mixer, whether it's a KitchenAid or another brand, involves practice and attention to detail. By understanding its functions and attachments, you can confidently tackle a wide range of recipes, making your time in the kitchen more efficient and enjoyable.
For those considering a new mixer or upgrading, our stand mixer buying guide offers valuable insights into what truly matters before you buy.